Tag Archives: silhouette Savvy Series

Silhouette Savvy Series – Creating your cut files by welding simple images


Hello Nerds!


Nathalie with you today bringing you a new entry to the Silhouette Savvy Series.   Though most of us like to collect pre made cut files, and alter them so that they fit the project you are working on.   I wanted to show you an easy way to increase your cut file library, and at the same time create one of a kind cut files.

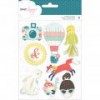
Cut files are created in many different ways, some come from drawings, others are alterations of an original images, but there are also others that are created by welding simple images together.  The following video will showcase how the Happy Mini Frames cut file (available for free at Scrapbook Nerd) was created:


As you can see, creating a cut file by welding simple images together takes no time, and can be easily be achieved.  The key is to make sure that each image that is welded has been converted to a “Compound Path’ so that when the images intersect/touch each other they can be welded together.


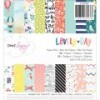
But now that you see how the cut out can be created, let’s put it to work in a new layout that uses Dear Lizzy’s newest collections, and Jane Davenport’s mixed media (all available at the Scrapbook Nerd Store)


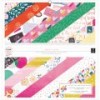
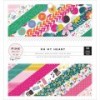
All the fun colors of the watercolor background help bring our the details of the cut out (which has been backed with papers from both Dear Lizzy’s collections)


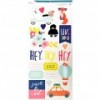
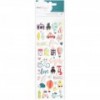
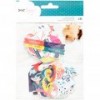
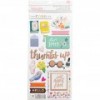
All the embellishments from the collections are perfect to tell the story of the picture.   The different die cuts and stickers are clustered in each of the picture frames, thus ensuring that the viewer’s eye travels throughout the entire layout.


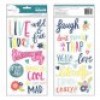
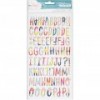
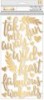
The title of this page was kept simple (though the word die cut is covered in glitter) but propped with some foam adhesive so that it won’t get lost in the page.


Now it is your turn to create your own cut files or use the new freebie one – just click here to be taken to the store for a free download –  to create a new page of your own.   Remember to tag us #scrapbooknerdca whenever you share your projects using this cut file on social media.

I am always a comment away if you have questions on how this came together or to help you with the Silhouette tutorial.

See you all around!!!


Nathalie D - designer at scrapbooknerd.com


Materials used:

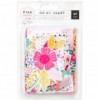
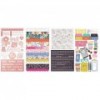
Dear Lizzy – Star Gazer collection – Ephemera, 6×6 paper pad, flair

Dear Lizzy – Stay Colorful collection – Ephemera, 12×12 paper pad, puffy stickers, cardstock stickers, glittered die cut words.

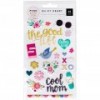
Pinfresh Studio – The Mix 2 collection – Epoxy stickers

Crate Paper – Carousel collection – Chipboard stickers

Jane Davenport – Memaid Markers


Silhouette Savvy Series: Welding Cut Files

Tutorials and creative tips


Hi there!

Hope you are doing well!

We are heading into February (time is flying!), and that means “Valentine’s day”.    The store will be releasing a few free cut files, this month.  The Love Story cut file is available now and the rest will follow on Feb, 1st.

I wanted to show you an easy way to manipulate the cut file to create a one-of-a-kind cut out by welding some of the cut file images.  So sit back, and take notes on how to weld cut file images together:


Here is a small cheat sheet on the steps to follow:

  • Open and trace each of the images you will be using.  Make sure that the image is converted into a Compound Path (highlight the entire image -only what will be used in the cut out-, right click on the mouse, and chose “Make Compound Path”
  • Move the image so that it is intersecting?touching the other image/images that it will be welded to
  • Highlight the all the images to be weld, right click the mouse, and chose “Weld”  or chose the Modify window, and click on the “Weld”comand.

It is that simple!  Two things to  remember are:

  1. Make sure you are only selecting the image that you will be welding together  ( you can always get rid of any extra images by releasing the path, and then deleting any unwanted pieces.  Don’t forget to convert the  cleaned image back to a Compound path).
  2. The images being welded have to intersect/touch for this comand to function correctly


Now let me show you how this page came together using the cut out created in the previous video, a bit of mixed media, and the beautiful “ROMANCE” collection from Simple Stories. SO  sit and enjoy the nex few minutes:


As you see, I used a bit of watercolor and Yupo transluscent paper to create my own marble paper to back the cut file.


All the embellishments from the “Romance” collection complement the picture of my husband and I while watching tv.


I hope this inspires you to bring out your Silhouette machines, and create a one-of-a-kind cut out by simply welding some images together.

Let me know if you have questions about how this came together.

Take care!

Nathalie D - designer at scrapbooknerd.com

Yupo Transluscent watercolor paper pad

Prima Marketing watercolor palettes – The Classics, The Tropicals, Pastel Dreams, and Odyssey

Simple Stories  – Romance collection – kit

, stickers, chipboard stickers, die cut pieces

Simple Stories – High Style paper pad

Free Love Story cut file at scrapbooknerd.com

ScrapbookNerd.com

Silhouette Savvy Series – Stitching Guides

Hello Nerds, and friends!

It is time for a new entry of the Silhouette Savvy Series.   This is  a tutorial, that had been shown before, but since then the Silhouette software has been updated, and the new version does not perform all the commands from the previous version, so I want  to show you an updated version of the same tutorial.   So sit back, and enjoy the following video that will show you how to create the stitching guide followed by the completion of the layout:


As you can see in the video, the Silhouette software does not have a perforate edge command anymore, instead you have to tell the machine what to do by choosing the type of line you want it to create on the layout.


I used the cut-line to add the stitching that forms the background/title for this page.   This is a way to shorten the tedious work of poking holes along the entire perimeter of the design.   This title took a bit of time to stitch (6 strands of embroidery floss use), but the texture and look it brings is worth the time… Just put on some music or a movie on, and start stitching away.


Once all the stitching was completed, I accented all the details with some Shimmer watercolor (Prima Marketing Metallics Palette), and some embellishments from the Illustrated Faith Advent collection.


I kept the stitching as the second focal point of the page, and chose a b/w picture so that it pops from the layout,  A few paper layers and embellishments complete this page.


I hope you try this new and updated way to create a stitching guide using the Silhouette Cameo.  Remember I am a comment away if you have questions on how this came together.


See you all soon!


Nathalie D - designer at scrapbooknerd.com


Illustrated Faith-Advent collection – Clear Stickers;  Illustrated Faith – Advent collection – 12×12 paper kit;  Illustrated Faith – Advent collection – Ephemera packIllustrated Faith – Advent collection – clips Illustrated Faith – Advent collection – Chipboard Stickers Illustrated Faith – Advent collection – 12×12 sticker pagePrima Marketing – Metallic watercolor palette 


Silhouette Savvy Series – One cut file, multiple ideas –


Hello Crafty Friends!

I hope you all are doing well, and enjoying the beautiful colors that are popping here and there after all those April showers (even though our part of Canada has been hit with lots of rain in May, also!).

This month I wanted to show you how versatile cut files can be, and how you can use the cut file  in different projects just by altering it a bit.    For this post, I am using the Scrapbook & Cards Today magazine free May 2017 cut file.

Scrapbook and Cards Magazine free May 2017 cut file


  • I was blessed to be this month’s SCT guest cut file designer, and got the opportunity to play with the cut file, so the first layout created features the cut file as  it was designed.


By simply rotating the original image, I was able to frame a large picture of my sister and her little  ( i used Simple Stories Faith collection for this layout)


  • The second layout created with this cut file features the flower ring as part of the layout’s mat, here is how I altered the cut file:

After highlighting the entire image, click on the modify window, and chose ” RELEASE PATH”. This is how the image will look like after the command was been activated.

Click,and delete all the images that are attached to the outer ring of the cut file. Make sure that the rest of the image remains unchanged. I have moved to the side all the pieces that were deleted from the image

Once again, highlight (drag the mouse over) the entire image; make sure all the small images are included in the highlighted square. This is how the image would look like after the highlight

After highlighting the image, click on the “MAKE COMPOUND PATH” on the Modify window, or right click menu. The image will look like the original cut file without the outer edge of the ring.

Here is the layout created with this altered cut file.   I chose to balance the page by adding fussy cut flowers to match the ones in the ring, and  a large picture that fit inside the flower ring.


  • For the last alteration, I decided to create an entire ring of flowers within the layout’s mat.  Here is how the cut file was altered:

Copy and paste an image of the cut file ( as used in the second layout). Make sure that each ring is a Compound path.

Rotate the ring until the entire inside perimeter of the ring is covered with flowers. It is important that you make sure each flower ring is a COMPOUND path (on its own). The ending leaves of each side of the ring will overlap.


After lining the two floral rings so that the perimeters overlap completely; highlight both images, click on the Modify window, and pick the INTERSECT option. The image will look like the picture -each little segment will be individually highlighted –

Highlight the entire image, and using the Modify window, click on the MAKE Compound path command to create the floral ring


For this project, the image was cut, and then all the cut outs were backed with papers from the Lovely Day collection.  The entire ring was then backed with vellum, and a light green paper from my stash.


A bit of hand stitching adds texture to the page, but also secures the layers together.   A bit of foam adhesive under the flowers, helps to add dimension to this page, also.   I added a small picture of my daughter to the background, and took advantage of the rings empty middle space to add embellishments,  Here is the final layout:


So there you go!  Cut files are so versatile, just a few little alterations are enough to change the look of the original cut.   There are still so many more opportunities with the cut file,    Next time you want to use  a cut file in a page,  consider altering a bit of the image, this will give you a truly one of a kind page.

I look forward to see how you can alter a cut file.  Remember I am a comment away, if you need assistance with any of the steps shown,

See you all soon!


Nathalie @ scrapbooknerd.com


https://static.inlinkz.com/ppr.js


ScrapbookNerd.com Canadian online paper craft supply store

Silhouette Savvy Series : Combining Cut Files

Hello there!

I hope that you all are keeping safe from the snow, and hopefully ready to welcome Spring (let’s hope it arrives soon!!!)

It is time for a new entry for the Silhouette Savvy Series.  This time I wanted to refresh a past tutorial, and maybe give you a new way to create a new image by combining cut files.


This time, I will use the HO HO Holidays cut file (It is a Christmas cut file!) to create a newer image.  So let’s get started:

  • i chose to work with the star shape, and the flower/firework image of the cut file.  After tracing and isolating the images (just click here to be taken to the tutorial that will show you how to trace and isolate an image);  the flower/firework was copied a few times, the images were then placed so that it resembled a star full of this image.
  • Once the images are in place, proceed to weld the image together (click here to be taken to the tutorial that shows how to weld images on the Silhouette software).


  • Now using the outer edge of the star shape on the cut file, simply size it to fit over the welded flower/firework images.
  • Use the mouse to highlight both images.
  • Go to the modify window, and chose the command “CROP”.  Remember to make sure the welded image has been converted into a “compound path” – this can be achieved by simply highlighting the entire image, right click on the mouse, and choosing “Compound Path”

This is what the new image will look like after the two cut files were combined by using the crop function.

  • Highlight the image, right click, and chose create a compound path of this image.  This is what the Silhouette will cut – a star made up of the flower/firework image-.


  • For this project, i added the outline of the star a second time.  Simply enlarge the image (just click on the image, and dragged your mouse until your liking), then highlight both images, go to the Nest window, and chose center.  Both images will be centered to each other.

Now you are ready to cut the images.   Just chose your medium, and send to the Silhouette to cut.   Here is few highlights of how this cut out was used:

Before welding the images, I copied them onto a new file in the silhouette software, and use the flower/firework image to cut the outline in various papers from the Oh My Heart collection.

This project transformed as it was being formed, and i chose to back the image with a light green paper from the Take Me Away collection, a bit of machine stitching secures the pieces together.

I had already scrapped the first picture of this series of my niece jumping on her bed for my album.  This layout is going in her album!  To frame the picture, I picked pieces from the Oh My Heart and TaKe me Away collections to frame the picture.

To balance, and ground the page, a strip of paper from the collection was added to the bottom of the page, and a small cluster was then created at one of the corners of the collection.  All the journal was added around the star edge.  Here is the final layout:

I love the colour in this page, and even though the initial cut out image was covered with the colour shapes, it can still be seen as a shadow of the shapes.

As always let me know if you have any questions on how this came together.  I am always a comment away.

See you all soon!

Nathalie @ scrapbooknerd.com

https://static.inlinkz.com/ppr.js

ScrapbookNerd.com

Silhouette Savvy Series: Stand-out stitched title #2


Hello there!

Happy New Year to you all!  May 2017  be filled with lots of health, love, happiness, and crafting time, of course!

I am back with a new entry for the Silhouette Savvy Series.  In a previous entry (click here to be taken to the entry)  i showed you how to use the pencil attachment to draw a design in the Silhouette Cameo.  This time, we will explore the same concept, but just using the regular blade on the machine.     For this entry, I am using the  ” ‘Tis the Season” cut file from the Cut Shoppe to create  the stitched title used in the project.

  • First, isolate and trace the image you want  to use ( you can find the tutorial on how to select and trace an image by clicking here).  Make sure that  you highlight the entire image, and create a compound path to the image.


  • Since, we will be hand-stitching the title, first we need to create a stitching guide along the perimeter of the image.  For this simply go to the Cut Settings window of the Silhouette, and select to perforate the edge of the cut file.  Here is what the image will look like after choosing this function.


  • Do not send the image to cut in the machine.  Instead go to the Offset window on the silhouette software, and click on create an external offset around the image.   You can chose how much space you will like around the stitched image.  Do not worry if the perforated line disappears in this stage.  Here is what your screen would look like at this stage.


  • Once again go to the Cut Settings window in the Silhouette software, and chose the command Cut Edge.  This will only create a cutting line around the edge of the offset of the image.  Now you will see the perforated lines of the image, and a solid line around the offset just created.  Here is what the image will look like before cutting:


Now all that is left to do is click on Sent to Silhouette for the machine to cut the image.  If you don’t see this image, just back track a few steps.  Usually this happens when the original image was not set to a compound path. So just undo the last few steps, make sure you create a compound path of the image, and follow the steps as highlighted in this tutorial.

Once the image is cut, I chose to use metallic watercolors to color inside the perforated line, and then spent a few hours watching Netflix, and stitching the  image.  Here is the final product:


I loved this picture of my kids playing with the lights of the Christmas tree, and this title was the perfect complement to this picture and layout.   The beautiful, Pinkfresh’s “Oh Joy” collection was ideal to document this lovely moment.  Here are some more close ups of the project, and the final layout.


As always, let me know if you have any questions on the tutorial.   I would love to see what you create with this technique, so don’t forget to tag Scrapbook Nerd when you share your project on social media.


Thanks for visiting today!


Nathalie @ scrapbooknerd.com


ScrapbookNerd.com Canadian online paper craft supply store

Silhouette Savvy Series – Layering Cut-files

V2-Nerd-Academy-600x132


Hello there!

One of my favorite things to see in a layout is dimension.  It can come from layering papers, embelishments, etc,  This time i will show you how to add dimension to a project by using cut files, and the best part is that it does not add bulk to the layout.  So let’s get started with a step by step picture tutorial:


  • I start by creating the mat cut-out.  For this I am using two separate cut files.  As you can see on the picture, I played with the word placement until i was satisfied with its position.

silhouette-savvy-tutorial-layered-cut-files


  • I made sure that each cut file was a “compound path” before highlighting both images, and welding them together (you can go back a few tutorials back on this series to see the video on how to weld images together).

silhouette-savvy-tutorial-layered-cut-files-1


  •  Once the image was welded, I created an offset to the entire image (just refer to the previous Silhouette Savvy tutorial to learn how to create offsets in the Silhouette software).  This will help when backing the cut file as it will provide the small pieces to highlight the small cuts in the word.

silhouette-savvy-tutorial-layered-cut-files-2


  • This step is optional.  I wanted to add some texture (through hand stitching in the layout), so I decided to have the offset line of the cut-out perforated (so i can follow the perforations with the needle and floss).  I set the machine to  cut the original welded image, and perforate the offset.  All you have to do is click on each of the paths and select the options you like on the cutting window.

silhouette-savvy-tutorial-layered-cut-files-3


  • Do not delete the original welded image, but make a copy of it (simply highlighted it all and click copy on the edit option).  Transfer the copied version onto a cut file that you want to use as layering piece.
silhouette-savvy-tutorial-layered-cut-files-4

the original welded cut file is the one in the black lines.


  • Move the welded image along the layering cut file until you are satisfied with the image.  Do not move the welded image.  Using the trace function (please refer to the first Silhouette Savvy series entry), and select just the area of the cut file that is behind the welded image (leave about an inch extra cut file on each side of the image).  And have just that piece cut in the machine.

silhouette-savvy-tutorial-layered-cut-files-5


The machine will not cut the entire cut file, just what you have traced.   Now i will show you how I used two of the newest Simple Stories collections (Posh, and The Reset Girl), to complete the layered looked of this layout.


family-you-are-completely-adorable-2

Here is the page after i hand stitched along the offset line created -you can call it the negative part of the cut-out-.  I saved the cut-out for another layout.


family-you-are-completely-adorable

The star background was backed with papers from the Simple Stories collections, and glued to a patterned paper from the Reset Girl basic paper pack.


family-you-are-completely-adorable-8 family-you-are-completely-adorable-7

I used some fun foam to layer the stitched mat, and lots of strong tape to attached it on top of the mat with the star background on it.


family-you-are-completely-adorable-5


I used a different paper to back the word family, this way it gets highlighted.  I simply used a pencil to mark little dots on where the word will be setting (before gluing it to the backing mat), and cut a small piece of paper to match the markings.


family-you-are-completely-adorable-6


Since there is a lot going on in the background, i kept the embelishments around the picture very simple.  Here is the final layout:


family-you-are-completely-adorable-3


As you can see, the shadow that forms form the different levels in the cut outs creates this lovely dimension to the layout.   Give it a try in one of your layouts!  As always let me know if you have any questions about any of the steps on the tutorial.

Don’t forget to check the Scrapbook Nerd store for all the products used in this page, or the Cut Shoppe for the background cut-files.

Thanks for visiting, today!


Nathalie @ scrapbooknerd.com


ScrapbookNerd.com Canadian online paper craft supply store

Silhouette Savvy Series – Stretch Your Cuts –

V2-Nerd-Academy-600x132

Hello everyone!

It is been a while since my last post, that even the season has changed.

Well today, i am back with a tutorial -no video this week- on how to stretch a cut file.  I don’t know about you, but i always try to see how can i use every single piece of paper that gets to  my desk.  I especially struggle with the leftovers from any cut-out from a cut file, and many times, I find ways to work them into another layout, or as layering pieces on my projects.

For this tutorial, i will be showing you how i go about using the leftovers of a cut file into a new layout, therefore stretching my cut.

  1.   I used the checkered heart cut file from    Studio Calico by Paige Evans to create a  cut out for one of my reveal layouts.  Once i  took the cut out from the mat,  the leftover cuts still had a great design, that could be worked into another layout.
best-ever-tutorial

I tried to use a cut file that had large pieces (as it makes it easier to transfer the design into a new layout)


2.   I picked some watercolor paper to start my new layout.  Using removable tape, I went ahead and glued the cut-out to the  watercolor paper.   NOTE:  using removable tape is the key to transferring the design.  If you don’t have removable tape, little pieces of washi tape can be used to hold the cut-out in place.

best-ever-tutorial-2


3.  Once the cut-out is glued.  I started to transfer the pieces (just like a puzzle)  from the cutting mat to the watercolor paper.  I made sure to use permanent glue to secure all the little pieces to the mat.   It was easy to transfer the pieces using the cut-out as a guide.

This is what the page looked like after transferring all the pieces.

This is what the page looked like after transferring all the pieces.

4.  I used a pencil to draw the outline of the cut out around the transferred pieces; then carefully, i peeled the cut-out out of the mat (if you are using washi tape, just be careful not to rip the cut-out).

best-ever-tutorial-5


5.  This is what i had left on the  mat after securing the pieces (i just added a few drops of glue to the  middle of the little pieces)

best-ever-tutorial-4


6.  Once i saw the pieced heart, all i could think about was mixed media.  So i went ahead, and used color shine to create a colorful background  (I think watercolor would have worked just as well).


The penciled heart was a great addition, as I used a piercing tool to create a stitching guide to the layout

The penciled heart was a great addition, as I used a piercing tool to create a stitching guide to the layout


I did not gessoed the page, since i wanted to create texture by wetting the pieces with ink -the corners of the pieces tend to curl a bit.


After stitching around the penciled heart, I added a picture of my baby (with just a few pieces of ephemera around),  a large title, and some journal lines.  I tried to keep the page simple so that the background showed as much as the picture.


BEST EVER @scrapbooknerd.com

The finished layout

I love this layout,   it is simple and full of color and texture.  I hope this inspires you into taking a second look at the leftover pieces of your cut-outs.

As always let me know if you have any questions about how the layout came together.

See you soon!


Nathalie @ scrapbooknerd.com


ScrapbookNerd.com Canadian online paper craft supply store

Silhouette Savvy – Creating stitching patterns.

Step by Step paper crafting tutorials @ scraobooknerd.com

Step by Step paper crafting tutorials


Hello everyone!,

I hope you all are enjoying the last half of summer;  it is amazing how fast this year is moving.

Today, I am back with a new installment of the Silhouette Savvy Series.   This time we will be looking on how the Silhouette software can be used to create a simple stitching pattern on a layout, like in this layout that serves as the sample of the tutorial.


ALL ROADS LEAD TO ADVENTURE-3


I love to add texture to my pages, and usually use hand stitching and embroidery to accomplish it.   There are many ways to add stitching to a layout, and some don’t involve a Cameo ( I will make a tutorial on them in the near future).   However, when there is a lot of stitching involved, it is easier to have the Silhouette software do some of the tedious work.  Please enjoy the video (and forgive my Spanish accent) on how to create a stitching pattern:


As you can see the video highlights how easy it is to create a stitching pattern on any project.  Here is a close up to the finished title after using back hand stitching to complete the pattern created:


ALL ROADS LEAD TO ADVENTURE


In case you missed any steps , here is a quick written list of the steps-by-step on how to create a pattern:

  • Select the image you want to use
  • Open the Trace window
  • Click : Select Trace Area
  • Highlight the area of the image you want to use
  • Unclick High Pass filter,  all the image will be brightly highlighted in yellow
  • Press Trace,  and move or delete the  traced  image .
  • Once you have the cut lines showing on the grid,  right click on the mouse to verify that the entire image is a compound path.
  • Position the image where it will be cut.
  • Go to the cutting settings window
  • Select Perforate Edge, and the type of paper being used
  • Click Sent to Silhouette

The machine will create little slits along the edge of the image chosen.   Use these as a guide to embroider, and add stitching to your layout.


Here is how the stitched title looks on my layout.  I chose Pink Paislee’s Outfitters collection, a new cutfile designed by The Cut Shoppe for Scrapbook Nerd  -The Wanderer- some mixed media, and distressed elements to document a picture of my kids at the “Marker of the World” – a popular post/signal in my native town down in Ecuador.  Here is the final layout


All Roads Lead to Adventure - @scrapbooknerd.com Silhouette Savvy Tutorial -


As always let me know if you have any questions about this tutorial or any of the previous tutorials in this series.   I hope this inspires you to use your Silhouette beyond creating cut-outs for your projects.


Till next time,

See you around!


Nathalie @ scrapbooknerd.com

ScrapbookNerd.com Canadian online paper craft supply store