Tag Archives: Pink Paislee

Creative Team Weekly Digest

Hi there!

Summer is rapidly coming to an end, and with it also go those long lazy hot days we all treasure so much.   While many of you take time off work to visit your cottages or travel, our design team has been busy bringing you some inspiration.

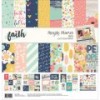
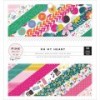
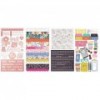
This week, we have asked the DT to create projects using Pink Paislee’s Auburn Lane collection, and  the projects are just beautiful, so let’s get started.  First up is Mari:

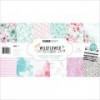
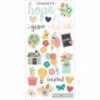
Mari cari created this layout using the color palette and collection pieces from Pink Paislee “Auburn Lane”. This collection has such a romantic/vintage feel…perfect for this wedding photo!


The Distress Oxide Inks used on the white background complement the colors from the collection. The JustNick Leaf Background cut file has texture paste added to it for some extra dimension on the layout. The florals and hearts are the perfect embellishments for this soft, pretty layout.

Love the soft tones and details in this romantic layout!  Beautiful page, Mari!  now it is Gisele’s turn to inspire us:

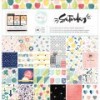
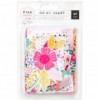
Gisele create this page with a picture of herself with her mother. Pictures those days were rare, and this is one of the very few she has of both of them. Circa 1953.

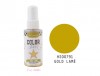
Her title is made of AC Thickers “Happy Life” and goes great with the gold in the page. She added a doily as a feminine touch and added sprinkles of Heidi Swapp Colour Shine in gold. In the upper left of the photo, she cut the ephemera frame in half and added both as corner embellishments. A few tags were added with a punch from her stash as well as the gold floss and the added heart charm

The play of patterns and that sweet picture make this a stunning layout!  Now let’s be inspired by Nathalie:


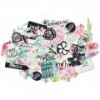
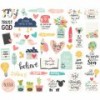
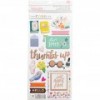
She created this page using fussy cut elements from papers from the collection.   This page was the focus of this week’s tutorial (previous post) that focused on adding fussy cut embellishments to your projects.


All those florals bring the page together by framing the picture of her family.   Beautiful page, Nathalie!


Well that is all for us this week!  i hope the DT projects have inspired you to take a closer look at Pink Paislee’s Auburn Lane collection.  This collection is available at Scrapbook Nerd, along with many of the newer liner releases.  So stop by to check what is new at the Store.

Have a great weekend!!


Nathalie D - designer at scrapbooknerd.com

Fussy Cutting elements

Hi there!

This week, we have asked the DT to showcase the beautiful Pink Paislee’s “Auburn Lane” collection in their projects.   This collection has a fall color palette, modern designs, and some beautiful floral illustrations that are perfect to embellish a page.   The secret is to fussy cut each of the floral images so that they can be used as decorations in your page.


The floral images on  paper #3 and #6 of the collection were carefully cut (fussy cut) so that they can be used as layered embellishments that form a large cluster of flowers in the  page.


The secret to creating this embellishments is to detail cut the images from the paper.   In this case, paper #3  has a dark background, so each image was cut around its edge, so that none of the dark background shows in the image.  At the same time, paper #6 has a white background, so a very small white border was left around the image – this just helps to separate the images when layering them on the layout.  The following process video will showcase how this page came together:


All those fussy cut florals are the focal point of this page, and bring plenty of interest to the layout that minimizes the use of other embellishments.


Really love how this page turned out using the large fussy cut floral elements.   All the florals create the perfect background for this cherished memory of my family.

I hope this inspires you to create your own embellishments by fussy cutting embellishments off your patterned papers.

As always, please do not hesitate to contact me with any questions on how this came together,  Remember to check all the materials used in this page at Scrapbook Nerd.

Take care,

Nathalie D - designer at scrapbooknerd.com


Auburn Lane collection – Papers #3, 6, 9, 10, labels, Alphas, 6×8 paper pad, puffy stickers, sequin mix

Distress Oxides – Spun sugar, Tattered Rose, Tea Dyed, Fossilized Amber, Crushed  Olive, Peeled Paint

Heidi Swapp – Gold Lame color shine

Nuvo  drops –  crystal drops – Pink Bubble gum

Vicki Boutin – Gesso


Weekly Creative Team Digest


Hello Nerds!

Another week has come to an end, and the Nerd Girls have been showing projects all this week inspired on the “Strawberry Social” theme.

Let’s have a look at what they have been sharing on social media, and in the Scrapbook Nerd Frinds and Fans Facebook page.

First up is Gisele with a beautiful and very colorful project featuring Phtotoplay’s Paprika collection.


She used a cut file from the SIlhouette store to create the background of this page, and then used the collection paper, designs and colors to embellish and tell the story of her family at Turkey Dinner.


Just love how she mixed all the colors and patterns together in one single page,   Beautiful work, Gisele!

Next up is Mari, with this gorgeous page that features Paige Evans, Pick Me Up collection, and a bit of mixed media on the background.

Mari started by using VIcki Boutin’s Art crayons and a brayer to create the soft yellow watercolor background for her page,  and then addd simple layers to behind the picture to create this gorgeous page.

Such sweet way to document a sweet family moment  Thanks, Mari!

Next up is Nathalie with this week’s Tuesday Tutorial,  Reworking  Backgrounds. In this tutorial she shared with us two process videos on how to transform a not so loved page into two beautifu new projects using the elements of the page,

The first page features Pebbles’ Patio Party collection, and a bit of mixed media to accent the  colorful picture of her family at the Strawberry Farm.


Lastly Nathalie also created this page using parts of the background of the not so loved layout.  She used Vicki Boutin’s products to create this new striking page.

Both fun ideas on how to repurpose an old layout.


That is all for this week!   Lots of inspiration being created and shared by our Creative team.   Remember you can see more of the projects on our Facebook Friends and Fans page.

Til next time!


Nathalie D - designer at scrapbooknerd.com

New Free Cutfile – Pretty Petals

Scrapbook Nerd and the Cut Shoppe

Hello there!

It is time for a new free cut file! YAY!!!

Our friends at the Cut Shoppe have created the Pretty Petals cut file just in time for Spring. The florals in this design are fun, and so easy to combine to document your  memories, at any time or season of the year.

I took advantage of the floral designs in the cut file to create a cascade of flowers in my layout that celebrates Sister Love.


Using the Silhouette Software, the floral motifs were sized to be at the largest 2.5 in.  Once the florals and the leaf pair were sized, a few extra leaves from the Fall Faves cut file  were also added to the file, and all cut from white textured cardstock.


All the flowers were backed using papers from Pink Paislee’s Pick Me Up collection,  however not the entire cut out was glued to the paper.  Instead glue was just added to the center of the cut out, so that the  petals of the flowers will lift, thus creating movement in the page.


The two flower design were backed with the same papers, so that they could be evenly spread on the page.


To back the leaves, a combination of papers from the Pick Me Up and Turn The Page collections were used – all leaves were backed with a diferent shade of green paper-.   The leaves cut outs wre glued fully to the paper, unlike the flower ones.


Before adding the flowers to the paper, a bit of mixed media was added using some white acrylic paint, and Jane Davenport’s Mermaid markers.  Once the background was dried, the picture was propped on some fun foam.


The flowers were then glued to the page to form  a cascade (half moon) around the picture.  Foam adhesive and strong glue were used so that there is dimension and movement in the page.  Since there is so much detail added to the page, just a few extra embellishments were necessary.   These chipboard pieces, sequins and stickers all come from Paige Evans’ Pick Me Up collection.


To complete this page, a title was created using a combination of chipboard stickersm and small alpha stickers wre used.  A few drops of gold ink, and journal lines complete this page.


The floral design and color in this page are the perfect way to celebrate sister love at its best.  Now it is your turn to put the cut file to work in a project of your own.  Stop by Scrapbook Nerd to get a free download of the file.

Remember to tag the store #scrapbooknerdca wheneever  you share your finished project on social media,  We would love to see your take on this file.  Have Fun!!!


Nathalie D - designer at scrapbooknerd.com


Pink Paislee – Turn the Page collection – 12×12 paper pad

Pink Paislee – Pick Me Up collectioon – 6×6 paper pad, 12×12 paper pad, Chipboard stickers, Cardstock Stickers, Haberdashery set, Happy Life alpha set

Jane Davenport – Mermaid Markers

Heidi Swapp – Color shine in Gold Lame


A New Take on Halloween || Combining cut files and mix media


Hello Everyone!!!


Can you believe we are about to celebrate HALLOWEEN!!  I know, time has flown this year!.  With this is mind, I started to dig through my picture files to check all my Halloween memories (as my teens do not dress up anymore!) to create a layout that brings Halloween with a twist.


For this project, I wanted to combine my love for cut files and mixed media in one page, so I thought about using mixed media to back the cut file.    As you can see, cut outs can easily be brought to life with just a few simple splashes of color, and not only patterned paper.


The pumpkin cut file comes from a free file from Paper Issues, and my choice of media this time was Distress Oxides in Black Soot and Orange Marmalade.  I simply used the cut out to lightly draw the shape on the cardstock, and then tried to add the mixed media inside the image lines.


Once the background dried, the cut out was stitched on top of the mixed media, and the background for the page was then formed.


Next a few pieces of ephemera, and embellishments from Pink Paislee’s Spellcast collection complete the look of this page.  The following video can give you a more in depth look at how a bit of mixed media can be used to back a cut out in your layouts:


I hope you enjoyed the video, and that it inspires you to experiment with different ways to back cut outs other than paper.   There are so many new  mixed media products and paper lines available at the Scrapbook Nerd store, take a few minutes to check the  store out,

I am always a comment away if you have questions on how this came together.


See you all soon!


Nathalie D - designer at scrapbooknerd.com


scxrapbooknerd.com supply list

Prima Marketing Amber Moon 12×12 paper pad

Distress Oxides – Black soot  and Spiced Marmalade

Pink Paislee – Spellcast collection – 6×6 paper pad, alphas, clear stickers, cardstock stickers, ephemera,


Nathalie’s Friday Recap


Hello Crafty Friends,

Can you believe we are at the end of my reveal week?!!.   This month’s projects were all inspired by the saying, ” April Showers bring May’s Flowers”, and boy!  did I  use flowers for all of this week’s projects.   Let me show you what i was inspired to create:

  • You Are My Bright Side.  The beautiful May cut file from Scrapbook and Cards Today magazine was the starting point for this page.  The fussy cut elements from the the Oh My Heart collection complete this page all about my little niece


  • 14!    This month’s Silhouette Savvy Series entry focuses on altering one cut file to obtain multiple looks and projects.   Once again the Scrapbook and Cards Today magazine cut file was used, and the samples were created using Dear Lizzy’s Lovely Day collection, and Simple Stories Faith collection.


  • Thumbs Up.    Continuing with the floral inspiration for the month,  this project features one of the paper cut outs that is included in the 12×12 paper pads from Pink Paislee’s Oh My Heart collection, a few french knots, and a colorful mixed media background.


  • MOM.   May is  the month to celebrate Moms!   For  this project, i created the cut file -which is available for free at the Scrapbook Nerd Store – and the gorgeous Kaisercraft Wildflower collection to document a sweet embrace between my mom and the littlest.


I hope these all serve as inspiration for your own projects.   Flowers never go out of style, and the paper kind last forever.

Remember to stop by the Scrapbook Nerd store to pick up the free cut file ( I would love to see what you create with it!), and to check all the materials used in these projects.  There is a lot of beautiful floral papers available in the store’s shelves.

I am a comment away if you have any questions on how any of these projects came together.


Take care!


Nathalie @ scrapbooknerd.com


https://static.inlinkz.com/ppr.js

https://static.inlinkz.com/ppr.js

ScrapbookNerd.com Canadian online paper craft supply store

Nathalie’s March Friday Recap

Nathalie @ scrapbooknerd.com


Hello there friends!

Can you believe that Spring is just around the corner?  But it seems winter just does not want to leave us yet!   I think we are ready for a new season, so all my good thoughts and vibes were channeled to this month’s projects, and my biggest source of inspiration was color.

Here is a quick look at what i created this month:

  •  “4”   The happy, colorful and super cheery “Joy Parade” collection from Fancy Pants Designs was perfect to document my little’s 4th birthday picture.   The  large confetti shaker element as a background just enhances the celebration feeling of this page.


  •  “HELLO FUN”   The layout was created as a companion to the Silhouette Savvy Series entry abut combining cut files.   The layout uses the free “Ho Ho Holidays”  cut file -designed by the Cut Shoppe for Scrapbook Nerd- and the new Paige Evans’s “Oh My Heart” collection to document my niece’s idea of fun, jumping on the bed.


  • “YOU”    I love florals, and the ones in the “Oh My Heart” collection from Pink Paislee are just so beautiful.   A bit of hand stitching to the fussy cut images was perfect to enhance the images details, and bring texture to this page.   A simple mixed media background complements the picture of my teenage daughter.


  •  “LIVE FOR THE MOMENT”   One of the new Pinkfresh Studio releases, “Dream On” was a dream to work with.  The patterns in the papers, and the beautiful color combination on the papers along with the Cut Shoppe’s cut  file added plenty of interest to this page all about my teenage son.


  • “FOREVER”   I just had to create this page,  since we have a lot of winter/snow pictures this year, I wanted to document one of my favorites in a non-wintery way.  So i picked this beautiful pink background from the “Oh My Heart” collection, added  this soft cut out -created from the Winter Lace cut file from the Silhouette Store-, and a bit of hand stitching to highlight the picture of my husband and I on one of our walks.

I hope this set of projects have served as inspiration to pull some color into your work, trust me is an excellent way to beat the winter blahs!

Remember to check the Scrapbook Nerd store to check what the ladies are bringing to the shelves, there are so many new products available.

I am always a comment away, if you need assistance with anything related to this projects or the blog tutorials.

Take care!

https://static.inlinkz.com/ppr.js

>ScrapbookNerd.com Canadian online paper craft supply store

Nathalie’s Friday Recap


Hello there!

First of all let me wish you all a Happy New Year!   May 2017 be filled with love, happiness, health, and lots of crafty time!

For this month’s projects, I chose to work with different techniques, media, and collections.   All the pretty patterned papers, and cut files are what inspired me to  create backgrounds where i can preserve my memories.   Here is a recap of all this month’s projects:

  • DREAM GIRL  –   This project combines some mixed media, a cut file ( The Cut Shoppe’s  Happy Clouds cut file), and the beautiful Crate Paper’s Cute Girl collection to document a sweet moment between my niece and our baby when they were both just toddlers.


  • ‘TIS THE SEASON TO SPARKLE  –  Silhouette Savvy Series tutorial blog post –  For this month’s entry to  the Silhouette Savvy series, I created a small tutorial showing  how to use the Silhouette  Cameo to create a stand-out title.    The title, along with Pinkfresh Studio’s “Oh Joy” collection were perfect to document  my favorite Christmas picture.


  • HAPPY NEW YEAR TO YOU.   Life is about little moments, and i was able to capture one of them while trying to get a picture of the 4 cousins.   For this projects, I chose to create a watercolor background, and use Simple Stories’ ‘Whatever” collection to   create a large title using the new Happy 2017  cut file, available for free at Scrapbook Nerd’s  store.


  • AMAZING & TIMELESS.   This project changed direction as it was being created. but the end result is just perfect.  Once again, I chose a cut file form The Cut Shoppe and watercolors to bring the background to live.  A few fussy cut flowers, and  embelishments from Pink Paislee’s Take me Away and Moonstruck collections.


I hope this projects inspire you to get creative with memory documenting.   Remember to always put a little piece of you in each project you create.

If you have any questions on how any of these came together, please do not hesitate to contact  me.

Thanks for visiting, today!


Nathalie @ scrapbooknerd.com


!– inlinkz code start –>

Watercolor Backgrounds for scrapbook layouts

Hello Nerds!

I have loved watercolorus since i took art classes as a little girl.   I especially love how the watercolour dries when splatter on paper, and how it can beautifully can add color to a scrapbook background.

On my last month reveal, I used a watercolor background on one of the layouts, and was asked on how to recreate the look. So i decided to give my Cameo a break for this month, and instead create a video to illustrate one of the ways i create a watercolor background.  Enjoy the video:

My apologies on not adding a voice over on the video, but it was shot a few weeks back while i was battling a bad cold, so i went with captions, instead!

Here are few notes to keep in mind when creating a watercolor background:

  • This particular background was created on heavy cardstock  (i love the Bazzill 12x12in Marshmallow card stock available at the store.  It can handle a large amount of mixed media without buckling or disintegrating) or water color paper that was not gessoed.   It is my personal choice to not gessoed these types of paper, as they can handle water nicely, and i like how watercolor dries on the paper.
  • If you are using regular cardstock or patterned paper as the background, then I will recommend you use gesso on the paper.  Try to use clear gesso, as it won’t dull the colors.  However the look of the background will be different, as the water and color will flood through the area, and the drying time is longer.
  • If possible use different brushes to create the background, this will help avoid muddling the colors.  Watercolor brushes work better for this, as they are softer than acrylic and oil brushes.
  • If you are using one color only, you can always play with the intensity of the color by controlling the amount of water used on the paper.
  • When using multiple colors, let some drying time in between colors, and chose to apply the lightest color at the end.  This will ensure that it does not get lost in the paint layers
  • When creating this background, always  start with water droplets on the page.  You can always change to alternating water and color on the next color layers.
  • Finally, if you are splattering color on a page, the size of the brush will determine the size of the splatters on the page.  A bigger brush will produce larger splatters.
  • Always remember watercolors lose their intensity as they dry, so add extra color if you want a more intense background.  Here is a picture of the fresh background, and you can see the dried background on the  layout.


I usually create backgrounds, and then finish the layouts, so i will give you some close ups on how i used the background, and Pink Paislee’s Take Me Away collection to document a picture of some of the women in my life.

i stitched the title using a free cut file from Juliana Michaels -Besties- after the watercolor had completely dried.


Here is the final layout:

I really hope this encourages you to pick up some watercolors when creating a background for your next layout.  You can always check the selection of palettes the Nerds have stocked in the store shelves ( i am trying the Prima Marketing collections, and loving them!).

As always, let me know if you have any questions.
See you all soon!

Nathalie @ scrapbooknerd.com

ScrapbookNerd.com Canadian online paper craft supply store

Silhouette Savvy – Creating stitching patterns.

Step by Step paper crafting tutorials @ scraobooknerd.com

Step by Step paper crafting tutorials


Hello everyone!,

I hope you all are enjoying the last half of summer;  it is amazing how fast this year is moving.

Today, I am back with a new installment of the Silhouette Savvy Series.   This time we will be looking on how the Silhouette software can be used to create a simple stitching pattern on a layout, like in this layout that serves as the sample of the tutorial.


ALL ROADS LEAD TO ADVENTURE-3


I love to add texture to my pages, and usually use hand stitching and embroidery to accomplish it.   There are many ways to add stitching to a layout, and some don’t involve a Cameo ( I will make a tutorial on them in the near future).   However, when there is a lot of stitching involved, it is easier to have the Silhouette software do some of the tedious work.  Please enjoy the video (and forgive my Spanish accent) on how to create a stitching pattern:


As you can see the video highlights how easy it is to create a stitching pattern on any project.  Here is a close up to the finished title after using back hand stitching to complete the pattern created:


ALL ROADS LEAD TO ADVENTURE


In case you missed any steps , here is a quick written list of the steps-by-step on how to create a pattern:

  • Select the image you want to use
  • Open the Trace window
  • Click : Select Trace Area
  • Highlight the area of the image you want to use
  • Unclick High Pass filter,  all the image will be brightly highlighted in yellow
  • Press Trace,  and move or delete the  traced  image .
  • Once you have the cut lines showing on the grid,  right click on the mouse to verify that the entire image is a compound path.
  • Position the image where it will be cut.
  • Go to the cutting settings window
  • Select Perforate Edge, and the type of paper being used
  • Click Sent to Silhouette

The machine will create little slits along the edge of the image chosen.   Use these as a guide to embroider, and add stitching to your layout.


Here is how the stitched title looks on my layout.  I chose Pink Paislee’s Outfitters collection, a new cutfile designed by The Cut Shoppe for Scrapbook Nerd  -The Wanderer- some mixed media, and distressed elements to document a picture of my kids at the “Marker of the World” – a popular post/signal in my native town down in Ecuador.  Here is the final layout


All Roads Lead to Adventure - @scrapbooknerd.com Silhouette Savvy Tutorial -


As always let me know if you have any questions about this tutorial or any of the previous tutorials in this series.   I hope this inspires you to use your Silhouette beyond creating cut-outs for your projects.


Till next time,

See you around!


Nathalie @ scrapbooknerd.com

ScrapbookNerd.com Canadian online paper craft supply store