Category Archives: Inspsired Nerd

Creative Team Weekly Digest

Hi there!

It is getting closer and closer to the magical days of Christmas.  We are so excited to welcome the holidays and  document all the memories that come with this season.   Our Design Team has been busy creating projects that will inspire you.  First  up Mari.


Mari created these Christmas Tags using the Lawn Fawn Say What tag dies and the Lawn Fawn Holiday Critters stamp and dies. The patterned paper used as accents is from the Really Rainbow Christmas, also from Lawn Fawn. There are so many options with these stamps and dies; the middle tag has a shaker element using sequins and shaker mix from Studio Katia.


It’s fun to make your own tags at Christmas time to attach to a gift for someone you love! They will adore these fun tag elements!   Thank you so much Mari for these beautiful tags!

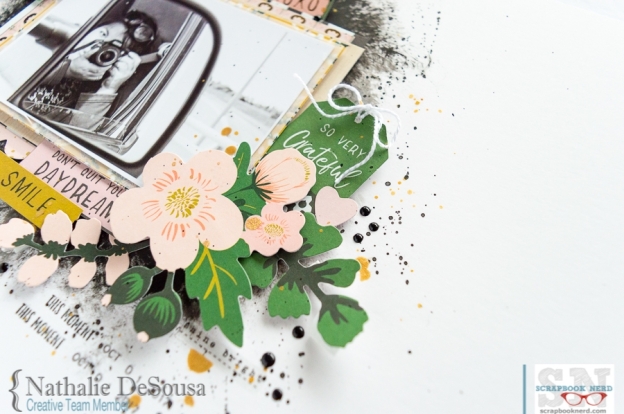
Next up is Nathalie and her colorful Holiday layout,


This week’s tutorial focuses on creating embellishments that will work with the ones in the Holiday collections,  Nathalie chose the new Merry Days collection from Crate Paper, and used mixed media and cut files to create the colorful background.


You can read more about her layout and see how it all came together in the previous post.   The colors of the trees are nicely accented with gold and embellishments from the collection.


Well, that is all for us today.   We would be taking a small break to enjoy our families and the season, so let us take this opportunity to wish you all peace, love and joy during the upcoming Christmas and thank you for all your support this year, we wish only the best for 2019.

Have a blessed holiday season!


Nathalie D - designer at scrapbooknerd.com


Creative Team Weekly Digest

Hello everyone!

Hope you all are enjoing what is left of Fall, it is snowing here in Canada already!   We took this week to celebrate Gratitude, and have asked our DT to create projects that document what they are thankful for.   So, let’s see what they have created this week, first up is Mari.


Mari created her layout using the Vicki Boutin mixed media products and papers and embellishments from Field Notes. Using a Crafter’s Workshop stencil, Mari added some acrylic gel medium to the edges of the Bazzil Marshmallow card stock. Once dry, she added some Art Crayons with a stencil brush.


Mari also added some Foil gel and added some Gina K foil to a few areas. Some more Art Crayon was added in a few other areas of the background using the Vicki Boutin stencil and the stencil brush. For more details, head over to Mari’s YouTube channel for the full process.  What a fun and colorful layout,  Thank You, Mari.

Next up is Nathalie.

Nathalie was up on this week’s Tuesday Tutorial with this new page that focus on working non-seasonal paper collections into a Gratitude page with an Autumnal feel.


She combined Kaisercraft’s Full Bloom collection and Vicki Boutin Mixed Media to create a soft layout that celebrates her family bonds.  You can check more details of the page on the previous post.

Now it is Joy’s turn.


Joy created this TN page in a Prime Marketing watercolor insert using watercolor crayons, a few stencils, stamping inks, and a favorite  quote about gratitude.   Art journals and now TN pages are Joy’s favourite way to collect life reminders and quotes.   Beautiful spread, Joy!

Wow!  what an amazing group of projects that celebrate gratitude.  We hope these inspire you to create a project about something you are thankful for!    Remember to stop by the Scrapbook Nerd store to check all the new products that are arriving at the store!

xo

Nathalie D - designer at scrapbooknerd.com

Creative Team Weekly Digest

Hi there!

It is time for the weekend!!! The perfect time to relax, rest and hopefully get creative.  This week our DT has been sharing some beautiful projects that are sure going to inspire you this weekend.

First up is Gisele with a gorgeous layout that showcases Simple Stories I AM collection.

GIsele used papers from the Simple Stories”Cabin Fever” and Crate Paper’s “Flourish ” to create the background for this page.  She created the butterfly embellishments by combining fussy cut butterflies from the I am collection, and some punched vellum.

Gisele added some layers of papers from the collection behind the picture and then added a few fussy cut flowers to the corners of her layers.

Gisele combined  alphas from different American Crafts collection to create her title, and then used stickers from the I AM collection to complete her journaling.  Such a beautiful page, Gisele!


Next up is Mari with a series of mini book ideas.

Mari created her first mini-book page using a piece of Bazzil Marshmallow card stock. The paper was trimmed to 6×6. Then, using the packaging technique, Mari added color to the white paper with Distress Oxide Inks in colors that complement the Amy Tangerine “Shine On” embellishments and paper.

For this 3×3 folded mini-book, Mari used Pink Paislee “Turn the Page”. The book is created using a 12×12 piece of patterned paper, folded into 3×3 squares in an accordian fold.

This 6×6 album was created by covering chipboard with patterned paper from Crate Paper “Willow Lane” and then embellished with a variety of Maggie Holmes collections.

These minis are so gorgeous, Mari!  Thank you for sharing!


Last is Nathalie with this week’s Tuesday Tutorial that focus on using black paint as the background for your pages.

She combined a bit of black paint with Kaisercraft’s Fleur collection to create this page.   You can find all the details, and watch her process video in the previous post.

Truly an eye catching layout!

Our DT has truly been sharing beautiful projects this week.  We hope these inspire you to get creative and  used them as inpiration to start a new project of your own!  Have a great weekend!

Nathalie D - designer at scrapbooknerd.com


Fussy Cutting elements

Hi there!

This week, we have asked the DT to showcase the beautiful Pink Paislee’s “Auburn Lane” collection in their projects.   This collection has a fall color palette, modern designs, and some beautiful floral illustrations that are perfect to embellish a page.   The secret is to fussy cut each of the floral images so that they can be used as decorations in your page.


The floral images on  paper #3 and #6 of the collection were carefully cut (fussy cut) so that they can be used as layered embellishments that form a large cluster of flowers in the  page.


The secret to creating this embellishments is to detail cut the images from the paper.   In this case, paper #3  has a dark background, so each image was cut around its edge, so that none of the dark background shows in the image.  At the same time, paper #6 has a white background, so a very small white border was left around the image – this just helps to separate the images when layering them on the layout.  The following process video will showcase how this page came together:


All those fussy cut florals are the focal point of this page, and bring plenty of interest to the layout that minimizes the use of other embellishments.


Really love how this page turned out using the large fussy cut floral elements.   All the florals create the perfect background for this cherished memory of my family.

I hope this inspires you to create your own embellishments by fussy cutting embellishments off your patterned papers.

As always, please do not hesitate to contact me with any questions on how this came together,  Remember to check all the materials used in this page at Scrapbook Nerd.

Take care,

Nathalie D - designer at scrapbooknerd.com


Auburn Lane collection – Papers #3, 6, 9, 10, labels, Alphas, 6×8 paper pad, puffy stickers, sequin mix

Distress Oxides – Spun sugar, Tattered Rose, Tea Dyed, Fossilized Amber, Crushed  Olive, Peeled Paint

Heidi Swapp – Gold Lame color shine

Nuvo  drops –  crystal drops – Pink Bubble gum

Vicki Boutin – Gesso


Nerd Girls Weekly Digest


HI there!

It is Summer!!!  yay!!!

finally warmer and longer days are here, kids are finishing school, and many have already left for their cottages and vacations, I think after our long winter we were more than ready to start Summer.    Thankfully this was the inspiration for this week’s projects for our DT, so let’s see what they created:

First up is Gisele with this beautiful layout that showcases Simple Stories’ Bliss collection.   All the purple hues in this collection are beautiful.  Gisele  uses a combination of the collection’s embellishments in this 8.5×11 creation.

She used a mixture of fussy cut elements from the collection as well as some pieces from Pinkfresh Studio (The Mix2 collection ) to complete the look of this page.   Simply gorgeous, Gisele!

Next up is Mari with a supper summery page:

Mari combined some mixed media (Vicki Boutin iridescent glaze, and DIna Wakely paints) to create the water scene of this page.   She then used the Splash cut file (free at the Scrapbook Nerd store) to add a colorful title to this page.

All the embellishments from Dear Lizzy’s Stay colorful collection just add the perfet touch to this super fun page of her family enjoying a summer day.   Beautiful page, Mari!

This week’s Tuesday Tutorial focuses on using patterns in the paper to create a focal point for your background.


Nathalie showed us this week how she transformed one of the papers in the Wander collection from My Mind’s Eye to create the focal point of this page.   Isn’t that picture of her baby just too funny for words!!


She used a bit of hand stitching to bring texture and a bit of interest to a rather simple layout. Such a clever idea!

It is always fun to see what the DT has been creating and inspiring us with each week. Now it is your turn to enjoy your Summer, create memories, and then take the time to document them. Remember that Scrapbook Nerd has lots of new collections available (many are perfect for all those summer memories), so stop by the store to check all the new goodies available.

Thank you for stopping by!


Weekly Creative Team Digest


Hello Nerds!

Another week has come to an end, and the Nerd Girls have been showing projects all this week inspired on the “Strawberry Social” theme.

Let’s have a look at what they have been sharing on social media, and in the Scrapbook Nerd Frinds and Fans Facebook page.

First up is Gisele with a beautiful and very colorful project featuring Phtotoplay’s Paprika collection.


She used a cut file from the SIlhouette store to create the background of this page, and then used the collection paper, designs and colors to embellish and tell the story of her family at Turkey Dinner.


Just love how she mixed all the colors and patterns together in one single page,   Beautiful work, Gisele!

Next up is Mari, with this gorgeous page that features Paige Evans, Pick Me Up collection, and a bit of mixed media on the background.

Mari started by using VIcki Boutin’s Art crayons and a brayer to create the soft yellow watercolor background for her page,  and then addd simple layers to behind the picture to create this gorgeous page.

Such sweet way to document a sweet family moment  Thanks, Mari!

Next up is Nathalie with this week’s Tuesday Tutorial,  Reworking  Backgrounds. In this tutorial she shared with us two process videos on how to transform a not so loved page into two beautifu new projects using the elements of the page,

The first page features Pebbles’ Patio Party collection, and a bit of mixed media to accent the  colorful picture of her family at the Strawberry Farm.


Lastly Nathalie also created this page using parts of the background of the not so loved layout.  She used Vicki Boutin’s products to create this new striking page.

Both fun ideas on how to repurpose an old layout.


That is all for this week!   Lots of inspiration being created and shared by our Creative team.   Remember you can see more of the projects on our Facebook Friends and Fans page.

Til next time!


Nathalie D - designer at scrapbooknerd.com

Tuesday Tutorial: Use a Grid for the Background


Hello friends!

Nathalie with you today, and if you have a lot of 2x2in cut apart cards (like the ones included in so many of the latest collections), then this is a way that you can use up to create a fun background for your next project.  It all started with a piece of cardstock, a pencil, ruler and some stitching material


Since i know the size of the cards, i chose to pencil a grid on my cardstock.  As you see in the picture i left about a 1 in from the top and sides of the page, and then created boxes that measure 2.5in per side


Next using a paper piercing tool, and a hook needle mat ( “the secret to creating straight lines and even spaced holes”) i proceeded to just punture the holes along the inside lines of the square (think of it as the lines in a TIC-TAC-TOE game)


The mat will help you to create straight even spaced holes for stitching.   Just line the mat to the line you will stitch, then use the piercing tool to create the pattern.  Remember to create holes at the same position inside the respective square


Once you have the holes in the lines created, then it is time to use some backstitching to create the ‘division’ lines in the background.   Since I am using Pebbles’  new collection -Patio Party- to finish this page, i chose to stitch the lines in 3 different embroidery thread colors that match the papers in the collection.


Once the stitching was done, I played with the location of the cards.  I placed the cards with the busiest or most  irrelevant pattern  where the picture will be placed, this way just a hint of the pattern will show up.   This is now the new background, and all it was left to do was to embellish.


The picture was backed with some papers from the collection, and then attached with some foam adhesive.  I took advantage of the dimensional layered stickers to create clusters at opposite corner of the photograph.


To add to the flower motiff of the page, i chose to fussy cut some from papers in the collection, and layered them between the papers behind the picture.


To complete my visual triangle, I added a third cluster at the corner of the page.  I chose to set the large sentiment cards at the side of  this square, so that the eye will be pulled to this stop.  Here is the completed layout:


This page took no time to put together, and i love how all thise small cards fused together to create the perfect background for the page,


Remembert to stop by Scrapbook Nerd to check all the materials used in this post.

see you all around!

Nathalie D - designer at scrapbooknerd.com


scxrapbooknerd.com supply list

Patio Party collection: 12×12 paper pad, layered stickers, layered acetate butterflies, cardstock stickers, wood veneer stickers

Hello Love collection: resin hearts


Creative Team Weekly Round Up

Hi There!

Hope you all are ready for the weekend.

This week the Scrapbook Nerd Creative Team has been rather busy sharing some inspiration with you all.   So how about we see what they have been up to:

Firts up is Gisele with this beautiful and colorful layout.  She used Jillibean’s Shades of Colour Soup to create the layers of this page.

She is a master a layering pieces, and in this page she also has combined the super trendy pom pom trim to create a super fun page.   Beautiful work, Gisele


Next up is Milena with her take on this week’s sketch.   She has created a very geometrical and colorful background using Dear Lizzy’s Star Gazer collection to document a picture of her daughter’s milestone.  Her large title across the top of the page is balanced with the small alpha stickers.   Such a lovely layout!


Here is the sketch Milena ( she is our Sketch Maker) has used in her page.   This is Milena’s last sketch as part of the Creative team.  But do not worry, she is not going far, she will be back every other week with a new sketch inspiration.  We are so lucky to have Milena in our team!


Finally is Nathalie with her new entry to the Silhouette Savvy Series.   She shared with us how to create the background cut out of her page by welding simple images together.


You can check her technique and process video in the previous post.   She shows you from start to finish how she incorporated mixed  media and Dear Lizzy’s collection in this  page.   Plus the cut file is available for free at Scrapbook Nerd.


That is all for us for this week!   Remember to stop by the Scrapbook Nerd Store to check all the new goodies arriving at their shelves.

See you next week!!!


Nathalie D - designer at scrapbooknerd.com

Silhouette Savvy Series – Creating your cut files by welding simple images


Hello Nerds!


Nathalie with you today bringing you a new entry to the Silhouette Savvy Series.   Though most of us like to collect pre made cut files, and alter them so that they fit the project you are working on.   I wanted to show you an easy way to increase your cut file library, and at the same time create one of a kind cut files.

Cut files are created in many different ways, some come from drawings, others are alterations of an original images, but there are also others that are created by welding simple images together.  The following video will showcase how the Happy Mini Frames cut file (available for free at Scrapbook Nerd) was created:


As you can see, creating a cut file by welding simple images together takes no time, and can be easily be achieved.  The key is to make sure that each image that is welded has been converted to a “Compound Path’ so that when the images intersect/touch each other they can be welded together.


But now that you see how the cut out can be created, let’s put it to work in a new layout that uses Dear Lizzy’s newest collections, and Jane Davenport’s mixed media (all available at the Scrapbook Nerd Store)


All the fun colors of the watercolor background help bring our the details of the cut out (which has been backed with papers from both Dear Lizzy’s collections)


All the embellishments from the collections are perfect to tell the story of the picture.   The different die cuts and stickers are clustered in each of the picture frames, thus ensuring that the viewer’s eye travels throughout the entire layout.


The title of this page was kept simple (though the word die cut is covered in glitter) but propped with some foam adhesive so that it won’t get lost in the page.


Now it is your turn to create your own cut files or use the new freebie one – just click here to be taken to the store for a free download –  to create a new page of your own.   Remember to tag us #scrapbooknerdca whenever you share your projects using this cut file on social media.

I am always a comment away if you have questions on how this came together or to help you with the Silhouette tutorial.

See you all around!!!


Nathalie D - designer at scrapbooknerd.com


Materials used:

Dear Lizzy – Star Gazer collection – Ephemera, 6×6 paper pad, flair

Dear Lizzy – Stay Colorful collection – Ephemera, 12×12 paper pad, puffy stickers, cardstock stickers, glittered die cut words.

Pinfresh Studio – The Mix 2 collection – Epoxy stickers

Crate Paper – Carousel collection – Chipboard stickers

Jane Davenport – Memaid Markers


Creative Team Digest


Hello there!

It is March already!  And we all are thinking of Spring, flowers and nicer weather.     Or at least are wishing for nicer weather to come!


This week our Creative team has been hard at work bringing a bit of inspiration for all of you!  Let’s see what they have been up to:

First up is Gisele with this beautiful Christmas layout,   She is using mostly Simple Stories Very Merry collection to document a picture of her family.


She fussy cut the large floral motif and added it as part of the large layer cluster behind the picture.  Her layers are beautiful!!!


Next up is Mari with this super cute set of cards.   She is using Doodlebug Designs SO Punny to create her cards.


Mari Created these A2 side folding cards using white card stock and the So Punny collection from Doodle Bug Designs. The 6×6 paper pad, Odds and Ends packs and the dimensional sticker were used from the collection.  Don’t you just love how sweet these cards are!!!  Thank you Mari!


Milena is using one of her sketches to create this awesome page.     She used  Simple Stories 2018 collection with some gold Thickers. The background page was too bold so she used some Gesso to create a feathery layer behind the photo.


What a fun sketch, and the so lovely page.   Cannot wait to see how you all interpret this sketch on your next page!


Finally, Nathalie was up on the  blog with this page.   She focused on showing us how to layer chipboard stickers (particularly these frames) without the undesired bulk.


She used some of the new Distress Oxide shades to create her background, and then Crate Paper’s Good Vibes collection to complete the page.


That is all for us for this week.   Thank you for stopping by, we hope you leave inspired!

See you all next week!!!


Nathalie D - designer at scrapbooknerd.com