Tag Archives: cut file

Having Fun with Along The Way

Hi there!

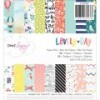
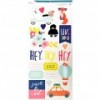
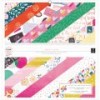
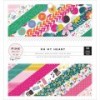
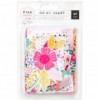
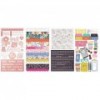
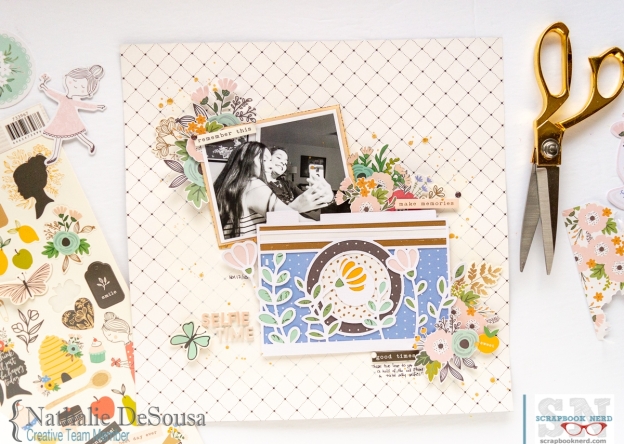
Nathalie with you today with a new layout that showcases the new “Along The Way” collection from Pebbles.   I  am a confirmed paper lover, but nothing makes me happier than finding collections that can be used in everyday documenting.   This collection has rich colors, and many designs that can be used at any season or time of the year.


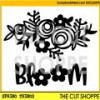
What better way to showcase a collection while documenting a picture than to detail backing a cut file.  For this layout, i chose a cut file from Handipaper, Floral Photo Camera to create one of the focus points of  this page.


This cut out is rather simple in design with intricate details, so i was careful backing each of the small areas of the cut to make sure that the small details come forward.  All the patterned paper in the collection made it so easy to bring the camera to live for this page.  The following video will show you a more in-depth look on how the page was put together:


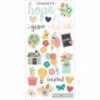
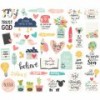
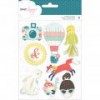
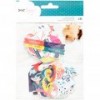
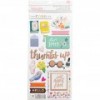
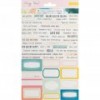
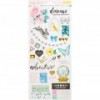
The placement of the picture in the page, along with the detailed camera are the focus of this page.   However all the fussy cut floral motif from the patterned paper, ephemera and stickers bring softness to this page.


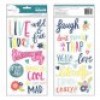
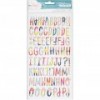
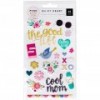
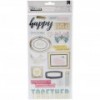
To avoid taking the focus away from the picture and cut out, a simple title was created using alphas from the Whimsical collection from Pink Paislee, and accenting it with a sticker from the Along The Way collection.


I hope this has inspired you to stop by the Scrapbook Nerd store to check all the materials used in this page.   Remember there are always new goodies arriving at the store!

As always, if you have questions on how this came together, please just leave me a comment here.

XO


Pebbles – Along The Way collectionn -12×12 paper pad, 6×8 paper pad, ephemera, stickers, word stickers, enamel dots

Pink Paislee – Whimsical collection – foam alphas

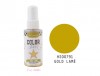
Heidi Swapp –  Gold Lame colorshine

WRMK – Mini Guillotine


Tuesday Tutorial: Creating Embellishments for your layouts

Hi there!

It is December!  Cue the confetti!!!  it is the jolliest and happiest of times (for some of us that is!) so, what better way than to celebrate it with color.  Today, I want to show you a simple way to make the most out of your Holiday collections while customizing some embellishments for your layout.


When I think Christmas, I always think of festive times with lots of color.   Unfortunately, the Merry Days collection from Crate Paper has color, but it is not as vibrant or festive as i have in mind for this layout.   Then, my choice was to create my own embellishments that will bring that much needed color to the page.   The following video will show you how it all came together:


As you can appreciate from the video, the colorful Christmas trees are customized to bring vibrancy to the existing colors of the collection.  The color is saturated in the trees so that they can show the small drops of white paint that are trying to create  snow capped branches.


The colorful trees are the basis for this page, as they bring the color and focus of the page to the picture of my two kids on their last day of school before the Christmas break.


By adding accents of gold in the embellishments used in the page, I am able to marry the new created colors to the pre manufactured stickers and embellishments.


All the colorful embellishments and background of thie page are the perfect background for this happy memory of my kids a few years ago.


I really hope you are inspired to customized embellishments and backgrounds for your next layout,  Remember you can always contact me if you have questions on how this came together.  Also, you can find all the materials used in this layout in the Scrapbook Nerd shelves so, stop by to check them and all the new arrivals.

Have a blessed day!


Nathalie D - designer at scrapbooknerd.com


Merry Days collection: 12×12 papers, 6×8 Paper pad, chipboard stickers, puffy stickers, cardstock stickers, word stickers

Jane Davenport Mermaid Markers

Heidi Swapp Color shine in Gold Lame

Vicki Boutin Foundation paper


Silhouette Savvy Series – Back to Basics


Hello everyone!

How is your Summer going?   We hope you are relaxing and enjoying the  wonderful weather.   Today’s tutorial is a bit of a  refresher / learning on a few basics on the Silhouette Software basics. The new updates to the Silhouette Software have made it easier to import and design cut files in their platform.


Just in case you missed any of the commands, here is small list of them:

To import cut files into the Silhouette Library

  • Import and open the zipfile containing the cut file
  • open your Silhouette Software, and set it on the Library tab ( you can easily create a new  file by right clicking  your mouse on the library file, under your user name account)
  • open your recently unzipped cut file (you will have three images to chose from)
  • click on the image that does not have a watermark on it, and use your mouse to drag it to the Silhouette library.   The software will automatically make a copy of the cut file in their library

To trace cut files in the Silhouette Software

  • Open the cut file you want to use in the Silhouette Design window
  • click on the Trace menu in the Design window (fifth image on the right hand side pannel)
  • select trace an image on the menu
  • use your mouse to select the are of the cut file you want to use
  • on the trace menu click on “trace”,  the red lines will show behind the cut file once you have properly traced it.
  • If there are part of another image you do not want to use, then highlight the entire image, right click on the mouse, and chose “release path” on the menu.   Delete all the unwanted lines  in the cut file, and then highlight all the image you want to cut (make sure you highlight all the little details inside the cut), right click on the mouse and select “create compound path”
  • send to the Silhouette software to cut.


Once you have seen the video, you will realize how easy you can import and trace a cut file in the SIlhouette Software.  The one that was used for the tutorial comes from the Let Sunshine in and it  is featured in this Traveler’s Notebook along with  Doodlebug Designs’ Hello Collection.


As always please do not hesitate to contact me with any questions related to this tutorial.  I will be more than happy to walk you through the steps.

Take care,

Nathalie D - designer at scrapbooknerd.com


scxrapbooknerd.com supply list

Doodlebug Design – Hello Collection kit, Chit chat die cuts, cardstock stickers

Pinkfresh Studio – The Mix 1 collection – Gold shapes foam stickers

Simple Stories – Hello Summer Collection – Cardstock Stickers, collection kit

Webster’s Pages – Traveler’s Notebook insert


Let The Sunshine in Cut file


Free Cut File | 12×12 layout – SWEET CHARM –

Hello there!

Nathalie, with you today,  bringing you a bit of inspiration using the newly released  “X to my O” cut file.   This new file was designed by the Cut Shoppe exclusively for Scrapbook Nerd, and you can find it in the store for free.

I played a bit with the original design, and separated the files, so that i can cut the outer circle out of patterned paper, while choosing to create a stitching guide for the xo pattern.


For this page, I reached for MME’s On Trend 2 collection, so the stitching was completed with the colors of the papers in the collection.


Once the stitching was done, I cut the circle from one of  the papers in the collection, and used a bit of foam tape to attach it to the stitched mat.


The picture of my niece on her 8th birthday was then placed inside the bottom corner of the circle, and then I used various embellies from the collection to create a cluster at the bottom corner of the picture.

A simple title at the opposite corner of the cluster complete the layout.   I just love the texture and dimension on this page, and it all was created based on the new “X to O” cut file.   So stop by the Scrapbook Nerd Store to pick up your free copy of the cut file.   Remember to tag @scrapbooknerdca whenever you share your finished projects using this cut file onto social media.   We love to see how you use the files!!

As always, I am a comment away if you need assistance or have a question on how this came together.

See you soon!

Nathalie @ scrapbooknerd.com

scxrapbooknerd.com supply list

MME On Trend 2 collection – 12×12 paper kit, 6×6 paper pad, cardstock and chipboard stickers, ephemera pack, and enamel dots

ScrapbookNerd.com

Nathalie’s Friday Recap


Hello Crafty Friends,

Can you believe we are at the end of my reveal week?!!.   This month’s projects were all inspired by the saying, ” April Showers bring May’s Flowers”, and boy!  did I  use flowers for all of this week’s projects.   Let me show you what i was inspired to create:

  • You Are My Bright Side.  The beautiful May cut file from Scrapbook and Cards Today magazine was the starting point for this page.  The fussy cut elements from the the Oh My Heart collection complete this page all about my little niece


  • 14!    This month’s Silhouette Savvy Series entry focuses on altering one cut file to obtain multiple looks and projects.   Once again the Scrapbook and Cards Today magazine cut file was used, and the samples were created using Dear Lizzy’s Lovely Day collection, and Simple Stories Faith collection.


  • Thumbs Up.    Continuing with the floral inspiration for the month,  this project features one of the paper cut outs that is included in the 12×12 paper pads from Pink Paislee’s Oh My Heart collection, a few french knots, and a colorful mixed media background.


  • MOM.   May is  the month to celebrate Moms!   For  this project, i created the cut file -which is available for free at the Scrapbook Nerd Store – and the gorgeous Kaisercraft Wildflower collection to document a sweet embrace between my mom and the littlest.


I hope these all serve as inspiration for your own projects.   Flowers never go out of style, and the paper kind last forever.

Remember to stop by the Scrapbook Nerd store to pick up the free cut file ( I would love to see what you create with it!), and to check all the materials used in these projects.  There is a lot of beautiful floral papers available in the store’s shelves.

I am a comment away if you have any questions on how any of these projects came together.


Take care!


Nathalie @ scrapbooknerd.com


https://static.inlinkz.com/ppr.js

https://static.inlinkz.com/ppr.js

ScrapbookNerd.com Canadian online paper craft supply store

Creating a background with Distress Oxides

Step by Step paper crafting tutorials @ scraobooknerd.com

Step by Step paper crafting tutorials

Hello there!

It finally looks like we have passed our Winter season!   Trees are starting to bloom, and soon everything will be once again full of light and color.

In fact this month’s reveals are inspired by color, and for this week’s tutorial, I want to invite you to discover Distress Oxides,

This new medium is so easy to work with, as it combines dye and pigment inks in one simple package.  The combination of the two creates a matte effect (due to the pigment) on the paper but allows the colors to shine on their own, and not to become muddled when mixed together.

Here is a small video on how the layout and background came together, so grab a seat, and ENJOY!


As you can see in the video,  I used a combination of Faded Jeans, and Cracked Pistachio  Distress Oxides to recreate the color of the water in the picture.   The colors, when layered, did not fade into a dark teal -which would have happened- had I used another medium.   I have played with some of the other hues and can say that you can create a multi-color background without muddling the effect by allowing the colors to dry a bit in between.  I will work a layout to show you in the near future.

Here are a few close-ups of the effect the Distress Oxides  look like once dried:

I love how the background looks like splattered water behind the picture and large title, and it was perfect to frame this picture of my daughter and niece enjoying our backyard pool. The colourful, and beautiful Bella Blvd. “Secrets of the Sea” collection was the ideal to complete this page.

Here is the final layout:


I hope you feel inspired to check the Scrapbook Nerd store for all the new colours of  Distress Oxides, as well as all the new collections available there.   You can always leave a comment if you have a question on how this came together.

See you all soon!

Nathalie @ scrapbooknerd.com

https://static.inlinkz.com/ppr.js

ScrapbookNerd.com

Tuesday Tutorial – Combining techniques with cut files


Hello there,

I hope you all are getting ready for the upcoming Spring season.  There are so many beautiful paper collections arriving at the Scrapbook Nerd store.   In addition, the Nerds are offering a new beautiful cut file, designed exclusively by Ashley Horton from the Cut Shoppe, for free.   Just hop to the store to get your free copy of the “Spring Things” cut file.


As you all know, I love cut files and my Cameo, so I set out to create a layout using the new Spring Things cut file and a few techniques along with it.  Firstly, I  used the “Bloom” image of the cut file to create the title of this layout.   In addition, an offset was created around the image ( this line was perforated by the cameo, so that hand stitching could be added to the layout).    Here is where i went technical in my cameo ( i promise a video tutorial in the near future), but you can achieve the similar result by using a pair of scissors, and trimming the cut file in such way that the bottom half of the letters become the edge of the background.


I recently picked Maggie Holmes’s Chasing Dreams collection from the store, and the watercolor paper in the collection was the inspiration for the mixed media in this layout,  Using the packaging technique, and a few Heidi Swapp color shine sprays the mixed media background was created.


The floral image was then used to create a sort of a lace layer on top of the mixed media.  I simply sized the image so that the edges peeked out of the small picture.


The word title of the image was backed with paper from the collection.  A bit of hand stitching (using the path created with the perforated offset of the image) adds texture to the page.


To add texture besides the stitching, I added a piece of torn vellum between the cut out and the patterned paper.   Some machine stitching secures the page together, and continues the texture of the stitching on the title.


The picture of my daughter was trimmed to a 3×3 in square.   Pieces of embellishments from the  Chasing Dreams collection were added to frame the picture.


The mixed media, hand and machine stitching, as well as the vellum layer add texture and softness to this layout.  Here is the final layout:


Remember to stop by the Scrapbook Nerd Store to pick up your free copy of the Spring Things cut file – it is truly a beautiful one -.

As always, i am a comment away if you have any questions on how any of this  came together.   I will be more than happy to lend you a hand.

Till next week!


Nathalie @ scrapbooknerd.com

https://static.inlinkz.com/ppr.js


Silhouette Savvy Series: Stand-out stitched title #2


Hello there!

Happy New Year to you all!  May 2017  be filled with lots of health, love, happiness, and crafting time, of course!

I am back with a new entry for the Silhouette Savvy Series.  In a previous entry (click here to be taken to the entry)  i showed you how to use the pencil attachment to draw a design in the Silhouette Cameo.  This time, we will explore the same concept, but just using the regular blade on the machine.     For this entry, I am using the  ” ‘Tis the Season” cut file from the Cut Shoppe to create  the stitched title used in the project.

  • First, isolate and trace the image you want  to use ( you can find the tutorial on how to select and trace an image by clicking here).  Make sure that  you highlight the entire image, and create a compound path to the image.


  • Since, we will be hand-stitching the title, first we need to create a stitching guide along the perimeter of the image.  For this simply go to the Cut Settings window of the Silhouette, and select to perforate the edge of the cut file.  Here is what the image will look like after choosing this function.


  • Do not send the image to cut in the machine.  Instead go to the Offset window on the silhouette software, and click on create an external offset around the image.   You can chose how much space you will like around the stitched image.  Do not worry if the perforated line disappears in this stage.  Here is what your screen would look like at this stage.


  • Once again go to the Cut Settings window in the Silhouette software, and chose the command Cut Edge.  This will only create a cutting line around the edge of the offset of the image.  Now you will see the perforated lines of the image, and a solid line around the offset just created.  Here is what the image will look like before cutting:


Now all that is left to do is click on Sent to Silhouette for the machine to cut the image.  If you don’t see this image, just back track a few steps.  Usually this happens when the original image was not set to a compound path. So just undo the last few steps, make sure you create a compound path of the image, and follow the steps as highlighted in this tutorial.

Once the image is cut, I chose to use metallic watercolors to color inside the perforated line, and then spent a few hours watching Netflix, and stitching the  image.  Here is the final product:


I loved this picture of my kids playing with the lights of the Christmas tree, and this title was the perfect complement to this picture and layout.   The beautiful, Pinkfresh’s “Oh Joy” collection was ideal to document this lovely moment.  Here are some more close ups of the project, and the final layout.


As always, let me know if you have any questions on the tutorial.   I would love to see what you create with this technique, so don’t forget to tag Scrapbook Nerd when you share your project on social media.


Thanks for visiting today!


Nathalie @ scrapbooknerd.com


ScrapbookNerd.com Canadian online paper craft supply store

Watercolor Backgrounds for scrapbook layouts

Hello Nerds!

I have loved watercolorus since i took art classes as a little girl.   I especially love how the watercolour dries when splatter on paper, and how it can beautifully can add color to a scrapbook background.

On my last month reveal, I used a watercolor background on one of the layouts, and was asked on how to recreate the look. So i decided to give my Cameo a break for this month, and instead create a video to illustrate one of the ways i create a watercolor background.  Enjoy the video:

My apologies on not adding a voice over on the video, but it was shot a few weeks back while i was battling a bad cold, so i went with captions, instead!

Here are few notes to keep in mind when creating a watercolor background:

  • This particular background was created on heavy cardstock  (i love the Bazzill 12x12in Marshmallow card stock available at the store.  It can handle a large amount of mixed media without buckling or disintegrating) or water color paper that was not gessoed.   It is my personal choice to not gessoed these types of paper, as they can handle water nicely, and i like how watercolor dries on the paper.
  • If you are using regular cardstock or patterned paper as the background, then I will recommend you use gesso on the paper.  Try to use clear gesso, as it won’t dull the colors.  However the look of the background will be different, as the water and color will flood through the area, and the drying time is longer.
  • If possible use different brushes to create the background, this will help avoid muddling the colors.  Watercolor brushes work better for this, as they are softer than acrylic and oil brushes.
  • If you are using one color only, you can always play with the intensity of the color by controlling the amount of water used on the paper.
  • When using multiple colors, let some drying time in between colors, and chose to apply the lightest color at the end.  This will ensure that it does not get lost in the paint layers
  • When creating this background, always  start with water droplets on the page.  You can always change to alternating water and color on the next color layers.
  • Finally, if you are splattering color on a page, the size of the brush will determine the size of the splatters on the page.  A bigger brush will produce larger splatters.
  • Always remember watercolors lose their intensity as they dry, so add extra color if you want a more intense background.  Here is a picture of the fresh background, and you can see the dried background on the  layout.


I usually create backgrounds, and then finish the layouts, so i will give you some close ups on how i used the background, and Pink Paislee’s Take Me Away collection to document a picture of some of the women in my life.

i stitched the title using a free cut file from Juliana Michaels -Besties- after the watercolor had completely dried.


Here is the final layout:

I really hope this encourages you to pick up some watercolors when creating a background for your next layout.  You can always check the selection of palettes the Nerds have stocked in the store shelves ( i am trying the Prima Marketing collections, and loving them!).

As always, let me know if you have any questions.
See you all soon!

Nathalie @ scrapbooknerd.com

ScrapbookNerd.com Canadian online paper craft supply store

Sunday Card Share # 62

Sunday card share at scrapbooknerd.com


Hello Everyone!

It is starting to look a lot like the Holidays, every where you look.  So why not add some holiday inspiration to our Sunday Card Share space ( I will be bringing you some inspiration to this space for a few weeks).

This week i wanted to bring you some ideas on how to highlight  cut-outs (cut files) by using foiled backgrounds.

card-share-12-04


These cards were created in a short amount of time with the help of the Silhouette Cameo,and a foiling machine. The cut files come from the Silhouette Store;  for both cards, I used white card stock to create the cut-out for  the cards.  While the Cameo was cutting the image, I used foil to cover a sheet of  toner  rich paper ( I simply print an entire sheet black in a laser printer, making sure that i set the  printer’s toner to maximum).


card-share-12-04-2


The foiled paper was then cut to within the edges of the cut-out card stock piece.   Both pieces of paper were attached together by using some strong tape adhesive.  Finally, this piece is attached to a card base of choice ( I am using a card base made of patterned paper, in this card).


card-share-12-04-4


Since the cut-outs in the cards are nicely highlighted by the foiled backgrounds,  the sentiment was kept simple.  I chose to attach some phrase stickers using foam adhesive, this not only adds dimension to the card, but brings some emphasis to the sentiment.


card-share-12-04-3


The last step to complete these  cards is to create envelopes to contain them.   These envelopes were created from pattern paper using an envelope punch, but you could use a Silhouette cut file, or simply find a pattern on the internet.
These cards came together in a very short time with the aid of the cutting and foiling machine. The combination of both cut outs and foiled backgrounds  do create a very striking look on the cards.

I hope this serves as inspiration to use either or both die cut and foiling machine when creating cards.  They do save a lot of time, and there is a large source of designs available.

As always, let me know if you have any questions on  how these came together.
See you all soon!Nathalie @ scrapbooknerd.com

https://static.inlinkz.com/ppr.js
ScrapbookNerd.com Canadian online paper craft supply store