Tag Archives: foiling

Sunday card share - Deco Foil Transfer Gel

Sunday card share #80 – Deco Foil Transfer gel

Sunday card share at scrapbooknerd.com

Happy Sunday!
Today’s share is all about foiling mixed with some product information. If you’ve followed us for a while, you’ll know the Nerds love Deco Foil. 😀

Thermoweb released a new product call Transfer Gel and it recently hit our shelves and my crafting desk,  I’ve created a video and a few cards to share how the Transfer Gel works and you can see a list of my supplies at the bottom of this post.

Here’s a closer look at the cards I created. Card Share - Deco Foil Transfer Gel - Happy Birthday card

Happy Birthday card with Deco Foil Transfer Gel

Thinking of you card with Deco Foil Transfer Gel

Thinking of you card with Deco Foil Transfer Gel

It's Your Bithday card with Deco Foil Transfer Gel

If you have any questions about the Deco Foil Transfer Gel or the projects created, please comment on this post and we will be happy to help.

Happy crafting!

Joy @ scrapbooknerd.com

https://static.inlinkz.com/ppr.js
ScrapbookNerd.com

One Canoe Two Hazelwood Collection with Barb

Hello everyone. I hope you’ve all had a great week where you were able to find some time to get into your crafty zone and get creative. I have, and it’s felt good. This week I’ve been playing with the fabulous One Canoe Two Hazelwood collection. This is a new collaboration between One Canoe Two and American Crafts. You know only great things could come out of these two getting together!

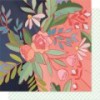
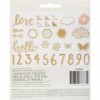
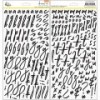
“The Hazelwood collection showcases the simple comforts in life and is accented by sophisticated hand lettering. Create stunning paper projects with an assortment of versatile embellishments in a pleasing palette of delightful mint, honeycomb yellow, and pale pink. ”

If you love a subtle outdoorsy feel on your papers, then this is the collection for you!

Project One: Capture the Memory

When I saw this collection it made me feel like I was in a flower-filled meadow with the butterflies gently fluttering by.  I knew I had grab some photos of a trip that my husband and I took this past summer. It was a train trip in Northern Ontario through the Agawa Canyon.  At the end of the line, we got off and spent some time walking through this serene scene.

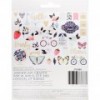
For this layout, I was inspired by both the beautiful florals and pretty butterflies in this collection. I simply used the ephemera and the cork shapes to embellish the page.

Project Two:  Boston Love

If you visited the blog earlier in the week, you saw this layout.  It was part of the tutorial this week on using the new Therm O Web Deco Foil Transfer Gel medium as a method of adding foil to your projects.  If you haven’t seen it, be sure to look back to check it out.  If you love foiling, you will LOVE this product!

Once again, the butterflies in the Hazelwood collection inspired me to pull out these photos of a girls’ trip we took to Boston.  We stayed in this gorgeous house, with a gorgeous yard that spilled out into a bay.  I love the cork shapes that come in this collection and used one of the words as part of my title. Once again, just adding some ephemera pieces and fussy cutting some flowers from one of the papers was all it took to finish this page off.

Project Three: Hey Little Lady

I’ve had these photos of my son and his grandmother on my agenda to do for a while now. He is 6’3″ and she is maybe 5′ now!

I love this large floral paper in this collection.  I decided to just fussy cut some of the flowers and just tuck them in behind the photos.  I loved the look and decided not to add too much more, as I didn’t want to take away from the beautiful paper, or the photos. Just adding in some gold words was perfect.

Those are my three projects for this week. Thank you for checking them out. If you haven’t added any of this collection to your stash, you really must do so. It is so gorgeous! You can find it all in the Scrapbook Nerd Store!

https://static.inlinkz.com/ppr.js

Foiling with the Deco Foil Transfer Gel

Hello everyone. It’s another Tuesday, and time for another tutorial. We have just received a large order from Therm-o-Web with new Deco Foil products. I’ve been anxiously waiting for this order to come so I could get my hands on the new Deco Foil Transfer Gel. This transfer gel allows you to create beautiful projects by adding foil using your stencils or screens. I decided to do a tutorial this week, on just how easy it is.


For this project I’ve used the One Canoe Two Hazelwood collection.
You will also need the following:
Deco Foil transfer gel
Deco foil (or similar type foils such as the Minc)
stencil
a laminator

How to:

I pre-planned where I was going to place my patterned paper and photos in order to determine where I wanted to place my stencil.

Once you decide where you are going to place your stencil, you will spread some of the transfer gel over top of the stencil, in the same way you would with texture paste, making sure to give a good, even coat.

Once you have added the gel, carefully lift off the stencil.
Allow some time (maybe 15 minutes or so) for the gel to dry before proceeding to the next step. You will know when the gel is dry as it will turn from white to clear.

Once the gel has dried, lay your foil over top and run through your laminator as per the instructions for your laminator (using either parchment paper or the laminator folders).

Peel off the foil and see the beautiful results!

Here’s a look at my completed layout. I love the look of the foil underneath the embellishment clusters and plan on doing this more often.

Thanks for visiting the blog today and for checking out the tutorial.
I hope you have a happy, crafty week!

https://static.inlinkz.com/ppr.js

Sunday card share #67

Sunday card share at scrapbooknerd.com

Welcome!
Have you ever created a project from leftovers?

The card I’m sharing today started with things I had sitting on my desk from other projects that didn’t make the cut then but were still really great for other projects.
I had two pieces of paper, on one I had stamped an image on some woodgrain paper and the other was a foiled a piece of white cardstock. Those two papers became the layers on this card.

Sunday Card Share at scrapbooknerd.com - So Very Blessed stamp set by Neat & Tangled

Now because most of this card was complete because of the papers I found on my desk, the rest of it came together quickly.

I heat embossed the So Very Blessed image using Versa Mark ink and black embossing powder and trimmed down the paper to fit on top of the foiled cardstock. All that was left after that was adhering everything to the card base.

It’s great when a project comes together organically like today’s card, it doesn’t happen often for me. I will continue keeping those leftover or used papers and see if I can make some more cards or other projects.

Thank you for visiting the SN blog today.
Happy Sunday!


Joy @ scrapbooknerd.com

https://static.inlinkz.com/ppr.js

ScrapbookNerd.com

Sunday card share #60 remix

Sunday card share at scrapbooknerd.com

Welcome!
Today’s card share has been remixed for our Countdown to Christmas series. The creative team is sharing holiday inspired projects until the end of the month and this post is packed with holiday cards.

ctc-nov-20aAll my cards today feature Prima Marketing adhesive rub-ons & Deco Foil. After my last card share we got some questions on how I used the negative/leftover image from a rub-on to create another project. I share more of that process below.

This first card uses a foiled focal image and a heat embossed background. Simple and interesting with the extra details.
ctc-nov-20b

  1. After creating the first card I was left with the fabulous negative image you see below.
  2. Using a piece of double-sided tape, I burnished on the image.
  3. The adhesive now holds the foil and is sticky in the middle where there is no foil.
  4. I adhered the image to some white cardstock and removed the top layer on the foil to expose the adhesive.
    ctc-nov-20c
    5. I place some silver foil over top of the image, rub it with my fingers then removed the extra silver foil to reveal the final snowflake image.
    ctc-nov-20e
    Here is card #2
    Sunday card share - Deco foil Christmas card with Prima adhesive rub-ons
    I repeated the same process to make the foiled image for card #3
    Sunday card share - Deco foil Christmas card with Prima adhesive rub-ons Sunday card share - Deco foil Christmas card with Prima adhesive rub-onsI hope you are enjoying the holiday project posts and that you find some inspiration for your own projects. If you would like to share what you have created, we’d love it if you post a photo on Scrapbook Nerds Friends & Fan Facebook page.Take care!
    Joy @ scrapbooknerd.com

https://static.inlinkz.com/ppr.jsScrapbookNerd.com

Sunday card share #59

Sunday card share at scrapbooknerd.com

Today is kind of a special day here on the SN blog, we’re starting a new series this month called Countdown to Christmas. This in an annual feature here and the Nerd Girls will be sharing their holiday inspired projects until November 30th, so check back often.
countdown-to-christmas2016
It’s no secret that we love foiling products from Deco Foil here at Scrapbook Nerd and this holiday season Prima Marketing has released some amazing adhesive rub-ons that are made for foiling. (You can see a list of my supplies at the bottom of this post)
Christmas card using Deco Foil & Adhesive Rub-Ons by Prima Marketing
I think these rub-ons make it easy for anyone to get great results and you don’t need any machines to help you. After transferring the rub-on to your project, cover the image with your selected foil (good side up), then you rub/burnish the foil with your fingers to make it stick to the rub-on. It’s really that easy!

The word hope was added on top of the gold foil using the rub-on word set. Layering different colours of foil is a fun way to add some detail to your project. Christmas card using Deco Foil & Adhesive Rub-Ons by Prima Marketing

It’s difficult to photograph the foil to really show how amazing it looks when you are finished.Christmas card using Deco Foil & Adhesive Rub-Ons by Prima MarketingAnother fun thing you can do is to use the remaining NEGATIVE image to create another project. I made sure that the gold foil from my first card was neatly cut before starting so I would be able to make this second card.
I used an adhesive sheet, rubbed the negative image on, then removed top clear plastic film from the gold foil to expose the adhesive and then added the black foil to that adhesive area. 
Christmas card using Deco Foil & Adhesive Rub-Ons by Prima Marketing

After burnishing the black foil I removed the clear plastic film for the big reveal.
Two projects from one rub-on.

I could have continued and used the next negative image to create a third card if I wanted to but I decided to stop there.Christmas card using Deco Foil & Adhesive Rub-Ons by Prima Marketing

I hope you enjoy this holiday series and find some inspiration for your own holiday projects this year. 🙂  If you have any questions let me know in your comments.
Happy crafting!

Joy @ scrapbooknerd.com

https://static.inlinkz.com/ppr.js

ScrapbookNerd.com

Sunday card share #49

Sunday card share at scrapbooknerd.com

Hello friends,

I have a couple of cards to share with you today. I had my Deco Foil foiling supplies out this week from another project so I decided to add some foil to my cards too.

Happy Birthday Card, scrapbooknerd.com Sunday Card Share
I wanted to use the full sheet of banner paper from the Maggie Holmes Bloom 6×6 paper pad, so I made these odd sized cards, both are 3″x6″. I used the Deco Foil foam adhesive sheet with some word dies for the sentiments, after die cutting them I added the pink foil.
The birthday stamp is from an old Hero Arts stamp set called – It’s Your Day. I added some black ink to the edge of the card to define the edges.
Happy Birthday Card, scrapbooknerd.com Sunday Card Share

This next card uses the same banner paper and a ‘happy’ word die from Technique Tuesday. Just like the last card I added the foil after I die-cut the word. I mounted the word on some pop dots and cut out a circle shape as the focal point.

Happy Birthday Card, scrapbooknerd.com Sunday Card Share

I added some embroidery thread behind the circle for some added texture after stamping the word birthday. I also added some black ink to the edges of the circle to make it stand out from the background a little bit more.Happy Birthday Card, scrapbooknerd.com Sunday Card Share

Both of the foiled pieces were made without the use of a laminator or Minc machine, so if you don’t own one you can make these cards too. You simply need the foil and some of the foam adhesive.

I hope you got inspired and try out some foiling on your next project.
Joy @ scrapbooknerd.com

https://static.inlinkz.com/ppr.js

P.S. If you want to see some more foiling ideas, check out the video below.

ScrapbookNerd.com Canadian online paper craft supply store

Sunday card share #46

Sunday card share at scrapbooknerd.com

Welcome to another Sunday card share,
I was introduced to Christmas is July years ago online and since then I make several Christmas cards throughout the month. I usually end up using one of those card designs for my Christmas cards in December.

Sunday card share @ scrapbooknerd.com
I stared with the tree die cut and decided to add some foiling, then more foiling and more foiling. 😀 I may have gotten a little carried away but I do really like the way this card turned out.

Sunday Card Share @ scrapbooknerd.com

The plain white background let’s the foiling stand out and I think this design will be good for bulk card production later this year when I make my all my Christmas cards.

Thank you for stopping by, I hope you got inspired.
Joy @ scrapbooknerd.com

https://static.inlinkz.com/ppr.js

ScrapbookNerd.com

Using the Heidi Swapp Reactive Screen Inks

Step by Step paper crafting tutorials @ scraobooknerd.com

Step by Step paper crafting tutorials

http://static.inlinkz.com/ppr.jsBarb @ scrapbooknerd.com

Hello everyone! Welcome back for another Tutorial Tuesday here on Scrapbook Nerd. I’m so happy to be back on the blog sharing this tutorial with you.

I’m sharing another foiling tutorial with you today. This time, it is with the Heidi Swapp Reactive Screen Inks. I’ve been anxiously awaiting for this ink to come into the store and it was well worth the wait!

If you’re not familiar with the art screens and inks, you really need to check them out. Art screens are exactly want they sound like – small screens. They are like a stencil, but because they are screens you can get much finer detail than you can with a stencil. The inks are designed to work specifically with the screens and once applied it leaves a beautiful image behind. You can find more information here.

Now, Heidi Swapp has come out with the Reactive Ink. What this is, is an ink that you use with the art screens and then put through your laminator/minc machine, along with the foil, and the result is gorgeous!!!! I am so happy with the result that now I think I have a new obsession.

The tutorial this week is a video tutorial on how I used the Reactive ink followed by a process video for the layout below.

Nerd Academy – Heidi Swapp Reactive Ink from Scrapbook Nerd on Vimeo.

Here’s a look at the finished layout and a close-up of the art screen ink: instalovecloseup

instalove3

You can find art screens, the regular screen inks, and the Reactive Screen Ink in the Scrapbook Nerd store, along with all the other foiling products.


Thanks for checking out my tutorial today.  I hope you feel inspired to add some foil to your next project through this beautiful medium.

https://static.inlinkz.com/ppr.js

Crazy Love – Dimensional Title tutorial

Hello Nerds!

I hope you all are enjoying the beautiful weather, and getting lots of crafting done.

This month, I was inspired to create using lots of white space, and focusing on the picture.  Since I wanted the titles to stand out on my white layouts (since most of them were made on white cardstock),  i used dimension and a hint of color to make them pop on the layout.   Here is how i went about creating my titles.

  • I used a cut file (Ashley Horton’s design) to create my title.  I cut 4 titles (with the same dimensions) on white cardstock using my Silhouette Cameo.   Note:   you can create this look using regular letters or alphas, as long as they are not thick -since they will be layered-.


CRAZY LOVE -title tutorial-

this is the original cut-out

  • Using the new Heidi Swapp MInc reactive mist, i covered one of  the cut-outs and set it aside to fully dry.  This step applies also to thickers or cut-out alphas.
  • While the mist dried, I attached two of the cut-outs together,  making sure that they sat flush together.  I tried to keep them as clean as possible as this piece will be the upper part of the title.  I set it aside to  ensure the glue dried completely.

CRAZY LOVE -title tutorial--2


  • I used the Heidi Swapp’s Foil on top of the reactive ink misted cut-out, and proceeded to put it through the laminator to completely set the foil onto the piece.  If you are using the MInc  machine, set the temperature to 3,  for any other laminator please check your manual for the right heat setting.  This step also applies if you are using alphas or thickers.


CRAZY LOVE -title tutorial--4

I chose this distressed look for the foil as it works with the layout; however if you want full coverage of the piece, i would suggest you use the Ink toner marker to color the piece before foiling


  • I glued the last cut-out to the newly foiled piece,  making sure that the  foiled side was facing up, and the two cut-outs sit flushed on top of each other.  I set it aside to make sure they dried completely.

CRAZY LOVE -title tutorial--5


  • The final step is to attach the white cut-out pieces to the foiled pieces making sure that there is an overlap on the pieces. In my case,  a small portion of the foiled cut-outs show under the white cut-outs -it looks like a shadow, or 3D piece-.  You can do the same if you are using alphas or thickers.   Make sure that you use strong glue, and leave it to dry completely before attaching it to your project.

CRAZY LOVE -title tutorial--6


  • If you don’t own a laminator,  the same look can be achieved by using the same cut-out but in different colours or textures.
  • I would suggest you used strong adhesive or a hot glue gun to attach the title to your project, as the layers do add weight -that could rip the layout’s mat-.  Here is how this title looks once attached to the layout.


Crazy love -tutorial- @scrapbooknerd.com

The small overlap of the white pieces on top of the foiled ones, give this title the look of graffiti on a wall, and helps to make it stand out on the layout.


I hope you try this idea on your titles or cut-out pieces on your projects.  It is not necessary to use foil pieces (I happen to love my MInc machine), just to create contrast and the overlap.  Here is  the final layout:


CRAZY LOVE @scrpbooknerd.com

The title stands out on the busy background.


As always let me know if you have any questions about this tutorial.

Till next time,

Happy Crafting!!!


Nathalie @ scrapbooknerd.com

ScrapbookNerd.com Canadian online paper craft supply store