Hello all you Nerds! Welcome back to another Tutorial Tuesday on Scrapbook Nerd.
This week I’ve been playing around with Amy Tangerine Oh Happy Life patterned papers, and some various embellishments from the Scrapbook Nerd Store. For this tutorial I decided to pull out my Heidi Swapp Screen Inks, as well.
For my tutorial, I’m sharing this quick, and easy layout that can be created in under an hour.
Here’s a peak of the layout:

What you will need:

- Patterned papers (three different papers – I used the Amy Tangerine Oh Happy Life collection)
- embellishments – journaling/title block from cut-apart paper, other bits of ephemera (I just cut pieces from patterned paper for my embellishments)
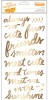
- word thickers of your choice (I used the Amy Tangerine Grace Phrase thickers)
- Heidi Swapp Art Screen and inks (you can easy substitute stencils and inks)
- Two sheets of white cardstock
- Your photos
Step one:

On a piece of white cardstock, lay down your art screen and apply the ink. Do a fairly large area so you have enough to work with. When I first started out, I knew that I wanted to use the art screen and ink, but in my head it looked different. I was wanting just a large area as a background behind my patterned paper, but I couldn’t get it to look right, so I tore it into a smaller piece to place behind my photo. Go ahead and tear your stenciled image large enough so that it will peak out from behind your photo. Adhere the photo to the stenciled piece.


Step Two: Cut two strips from two different patterned papers. One will be one inch and the other 1/2 inch. Lay both these strips at the bottom of the second piece of white cardstock. Cut your third piece of patterned paper into a square (ish) large enough so that your photo and your stenciled image to fit onto. Adhere to your layout on the right side.


Step Three: Place a Journal/title square on the lower left side of your photo(s) On the lower right side of the journal square place a word from your thicker sheet.
Step Four: Place embellishments in the upper left corner, and the upper right corner of your photos. I cut my embellishments from some of the patterned paper from the Amy Tangerine collection. Layer smaller embellishment pieces in, as needed. Add another word thicker to your embellishment cluster on the upper right corner of the photo.


Step Five: Add journaling, if desired, and enjoy your layout.
Thank you for stopping by the blog today and checking out my tutorial. We’d love to see your finished project so be sure to share it with us on our social media pages.